
VMware vSphere 6 is comprised of many components. Really, there are two main components that all of the other add-ons are dependent on – ESXi and vCenter Server. ESXi is the actual operating system that installs on the bare metal (the physical hardware). VMware vCenter Server is the software that runs on either a physical server (within Windows) or in a Virtual Machine/Virtual Appliance. ESXi is the core of the vSphere solution – it is responsible for handling the scheduling of resources to each VM, taking care of network configuration, etc. The vCenter Server is responsible for orchestrating events to the ESXi server or servers. For instance, if you have a single ESXi host then you won’t be performing any vMotion actions as you don’t have a cluster. But if you do have a cluster, the cluster is not entirely self-aware – vCenter Server manages the multiple ESXi hosts and orchestrates migration of VMs between the hosts. The actual migration occurs between ESXi hosts, but the vCenter Server is chiefly responsible for getting the ball rolling.
vCenter Server does so much more, as well. Some of the other things that the vCenter Server is responsible for is templates, High Availability (HA), Distributed Resource Scheduling, vMotion and Storage vMotion, etc. The list really goes on.
In this blog series I am going to cover installing ESXi, configuring ESXi, deploying the vCenter Server Appliance (VCSA), configuring the VCSA, and creating a VM. I’ll probably create a separate blog entry for creating a Windows-based vCenter Server at a later point. Most of the time, especially in labs and test environments, you’ll want to deploy the VCSA since it doesn’t require a Windows license.
Below is a link to each part of this series:
Part I – Installing and Configuring ESXi 6.0
Requirements for Installation
There are a few requirements before you start to install ESXi. Firstly, I am going to assume you’re installing ESXi on supported hardware. This guide will not cover slipping VIB files (drivers, etc.) into an image for hardware that is not supported by default. In fact, this tutorial is going to be based on installing ESXi 6.0 Update 1a on a Dell PowerEdge 1950 server that I have as a spare. I also run ESXi 6.0 Update 1a on a Lenovo TS140, but that required slipping some VIBs into the base install – this is not covered here!
One thing you have to be aware of is that most vendors will release an ESXi ISO that is customized to their hardware – for instance, the Dell customized image is available here.
If you decide to use a vanilla ESXi image from my.vmware.com that is fine, but realize that you may not have some hardware/software integration features that would otherwise available. For instance, with the Dell custom ISO I can see the PERC battery status, etc. On the contrary, running customized images means you are at the mercy of the hardware vendor to release the latest update for you so what is available may not be the latest ESXi release. Another frequent issue when installing vanilla images is that some network devices will not be detected – there’s nothing like sitting through the ESXi installer to find that no network devices are present.
The first step to installing ESXi is configuring your storage. I will not go over configuring storage because its very dependent on the hardware used and even then there are many options. You can install ESXi on a RAID1 of two disks, or a RAID10 of 24 disks – it doesn’t matter. The ESXi installation can sit on the same disks that will also hold VMs if you want to do it that way. The only requirement is that the storage be visible to the server and not a software-based RAID. You can also install ESXi to a USB memory key or SD card – I do this on one of my Dell R710 lab machines as it means I can blow out the RAID config without ruining the host OS. So, this article will assume you’ve setup your storage already and are ready to install the actual OS.
Installing ESXi 6.0 Update 1a
When dealing with servers you will usually have an out-of-band controller (iDRAC, iLO, etc.) that will let you do BIOS/OS installation remotely. If you don’t have an OOB interface then you’ll need to do the installation via conventional means (monitor, keyboard, mouse, etc. local to the machine). I am installing ESXi through iDRAC with a virtual CD mounted through the iDRAC – if you don’t have this option you’ll need to burn the ISO to CD or USB key and install from that. The installation is the same whether its through iDRAC or CD.
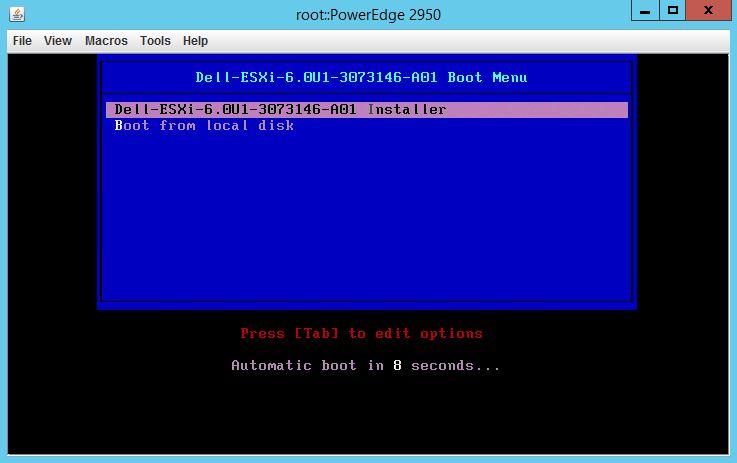
Once you’ve got the server powered up and the virtual CD or physical CD in the drive, you’ll want to press whatever key is necessary to instigate a boot menu to boot from CD or virtual CD. When it’s booting, the ESXi installation menu will flash for a short duration before automatically starting:
Next, the installer loads all sorts of modules – be forewarned, this part takes a while:

After everything is loaded you’ll be greeted with the ESXi installation Welcome Screen:
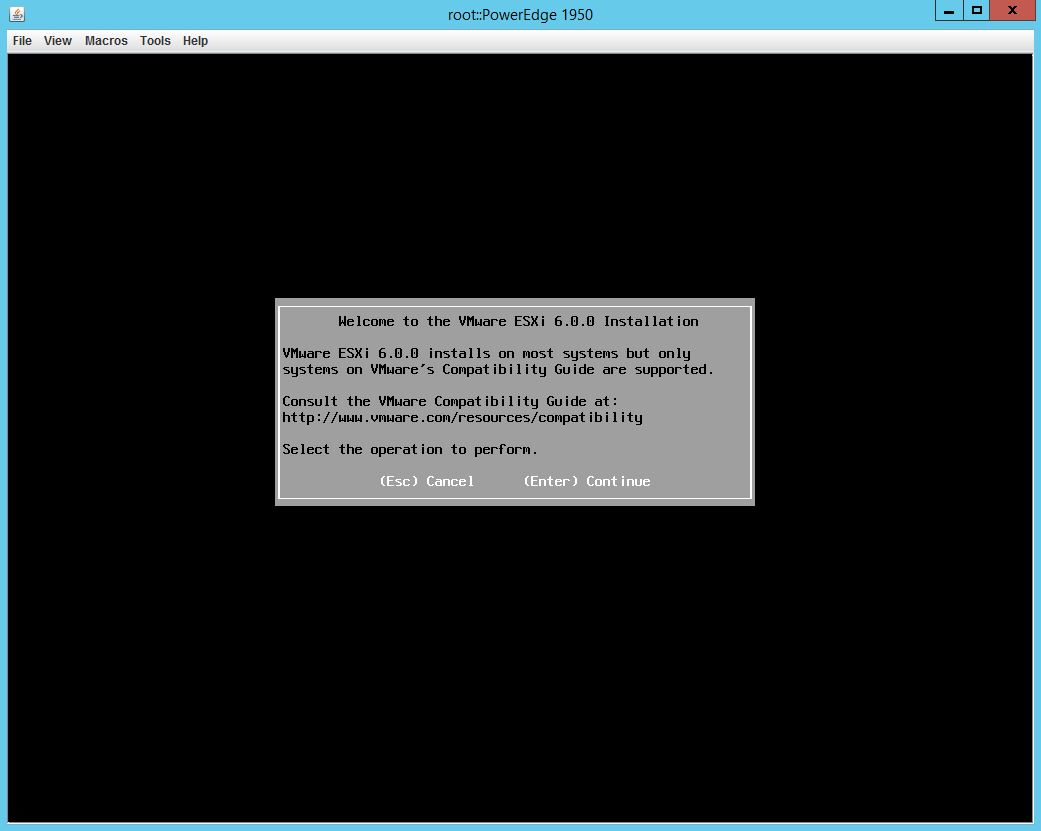
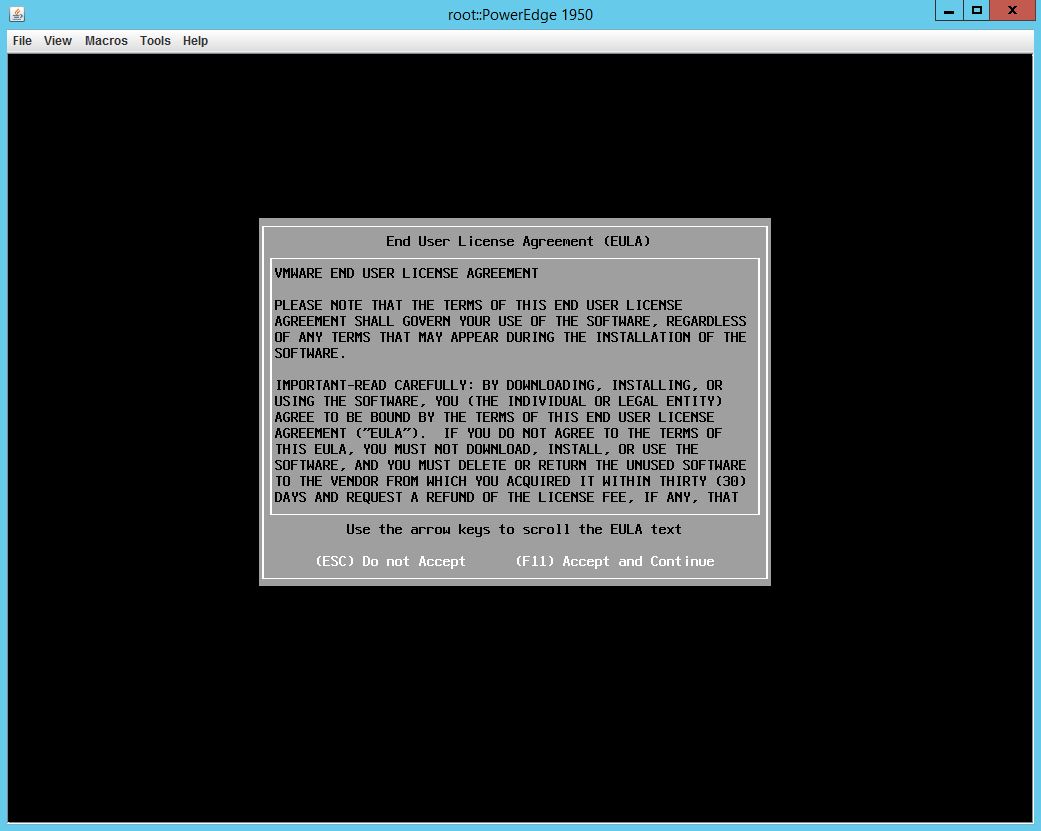
You’ll want to press Enter to continue on with the installation. You’ll then be presented the EULA which can be accepted by pressing F11:
The next screen flashes for, hopefully, only 15 or 20 seconds. This is where ESXi does a quick scan of your hardware looking for valid installation locations:

If you’ve got valid storage (basically anything except for softare-based RAID arrays) then it should show up in the next screen where you will press Enter to install to the selected storage:
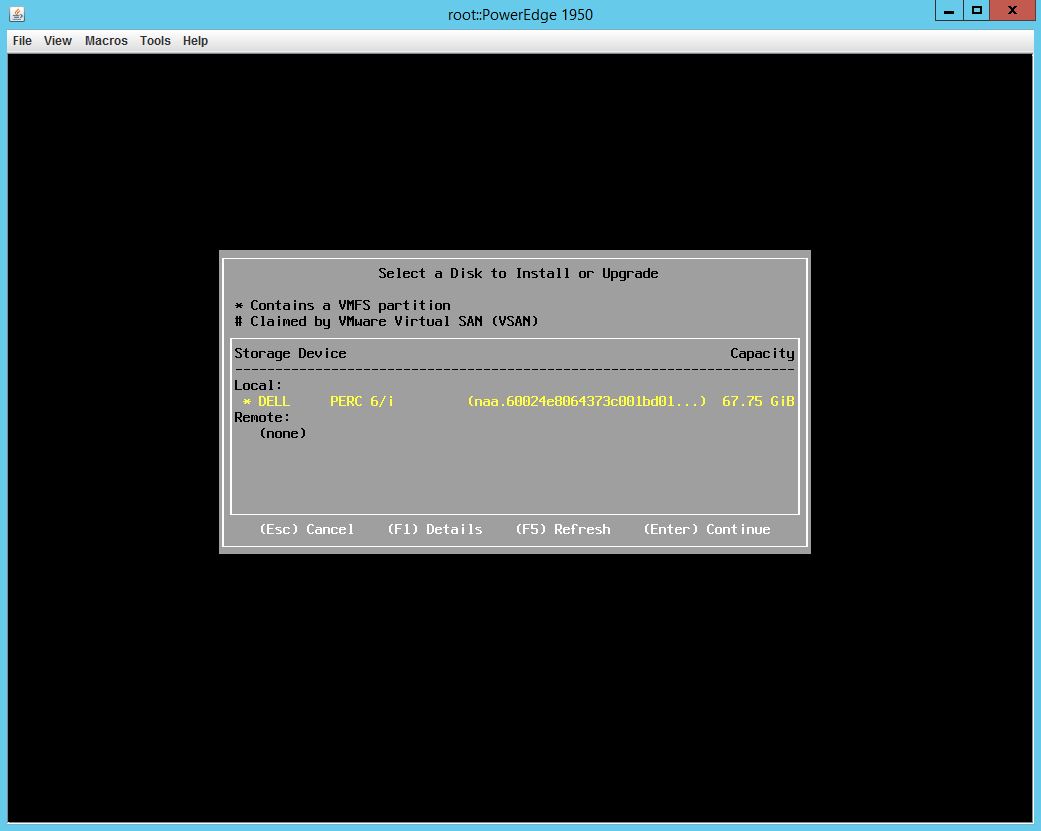
The storage I selected is a RAID1 comprised of two 73GB 2.5″ SAS drives. Because I test a lot on this machine, there’s already data on the disk – you’ll see this message if that’s the case:

Note in the image above that the ESXi installer detected not only data on the drive, but that it contained a VMFS datastore. It gives us three options:
- Upgrade ESXi, preserve VMFS datastore
- Install ESXi, preserve VMFS datastore
- Install ESXi, overwrite VMFS datastore
Option 1 is one of the methods available for upgrading your ESXi installation from a previous version – the data stays in tact but the OS is upgraded. Option 2 installs ESXi fresh but keeps the data on the disk. Option 3 installs ESXi fresh and blows out whatever data is on the disk – I’m choosing this option for this tutorial.
After picking your option for installation, you’ll be asked to set the default language:

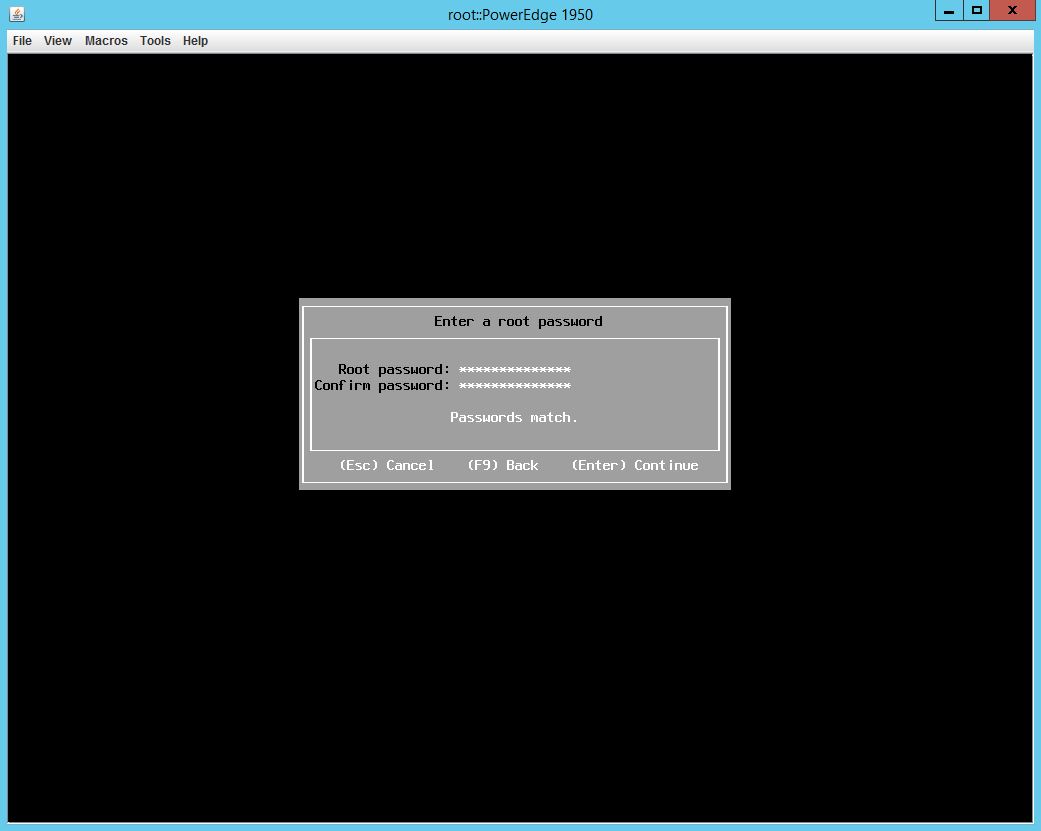
Next set the root password for the host – do not forget this, it comes into play throughout your vSphere experience:
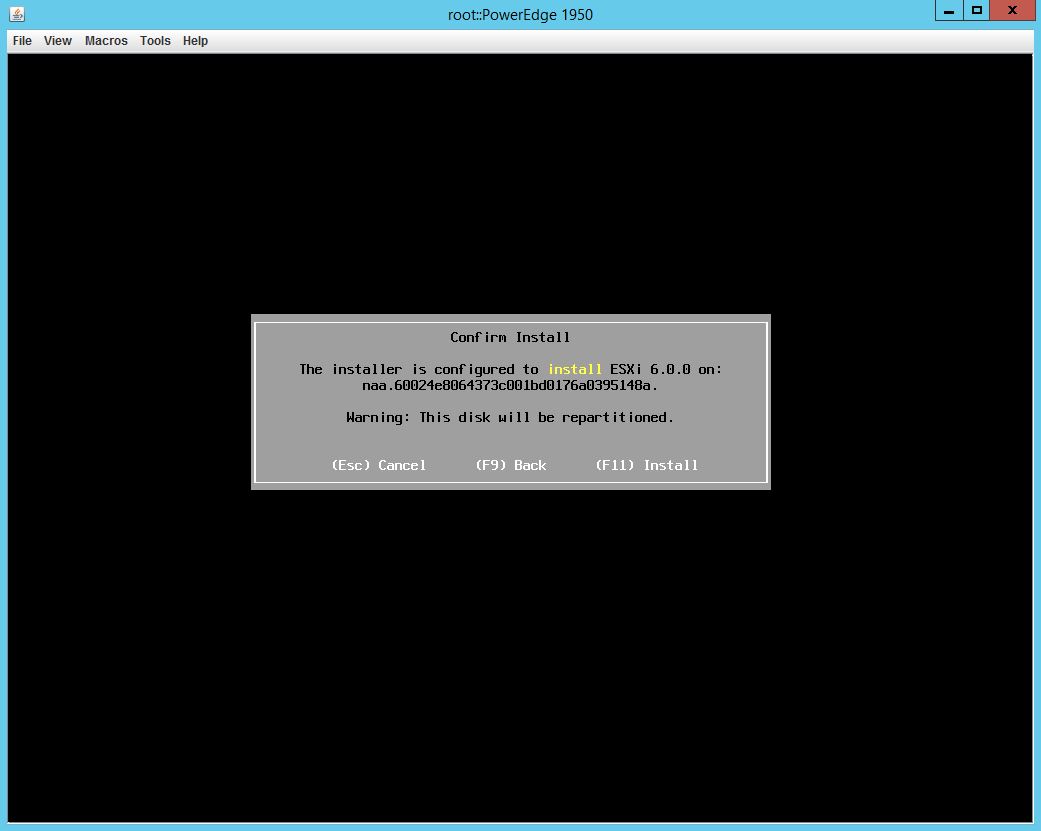
Finally, you just need to press F11 to confirm your options and that you want to install to the disk you’ve selected:
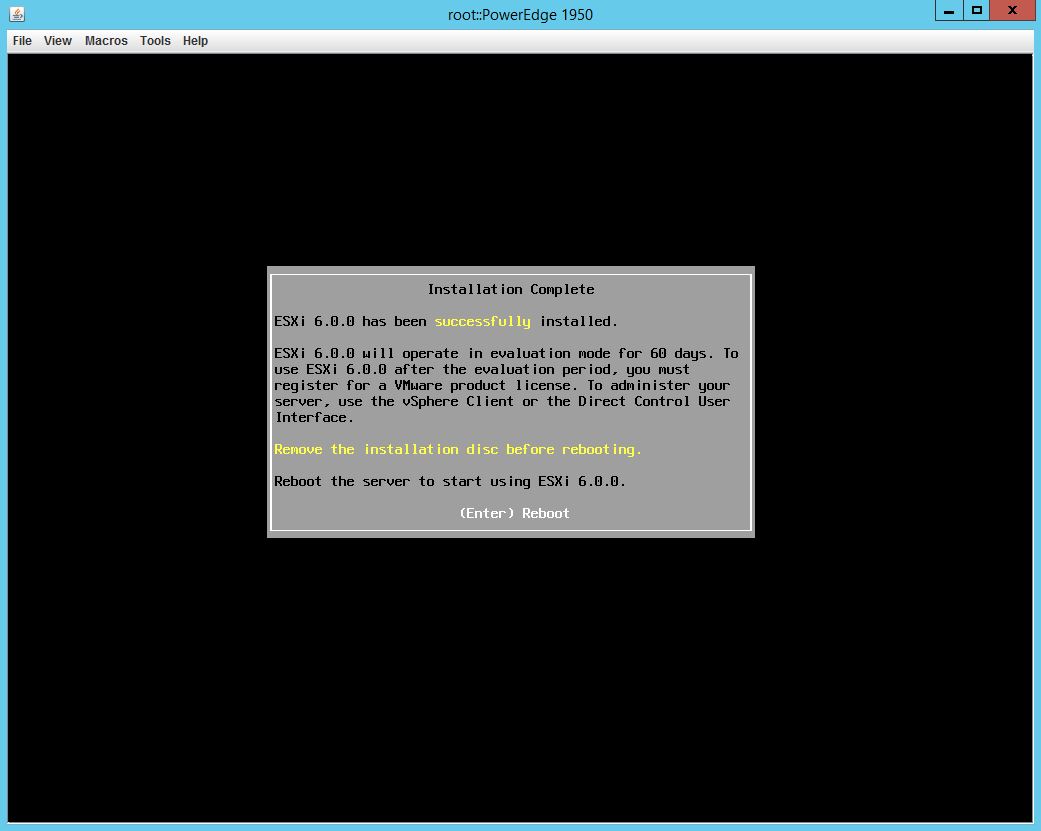
Once the installation is successful you’ll see the final screen cautioning you to remove the CD and press Enter to reboot:
Configuring ESXi 6.0 Update 1a
Once ESXi is installed and boots up you’ll notice a pretty gnarly looking yellow and grey screen. Don’t expect it to look any better – this is what ya get when looking at the console of the host – it ain’t pretty but fortunately you won’t be in here too much. You’ll also notice some system specifications at the top of the window and the URL/IP address below:

If you have DHCP working on your network it’ll pull an IP. Naturally, you will want to set the IP to something static so you can always access the host if DNS is not functioning properly. To get started with configuration, press F2 and enter your root password. Once you do, you’ll see the following:
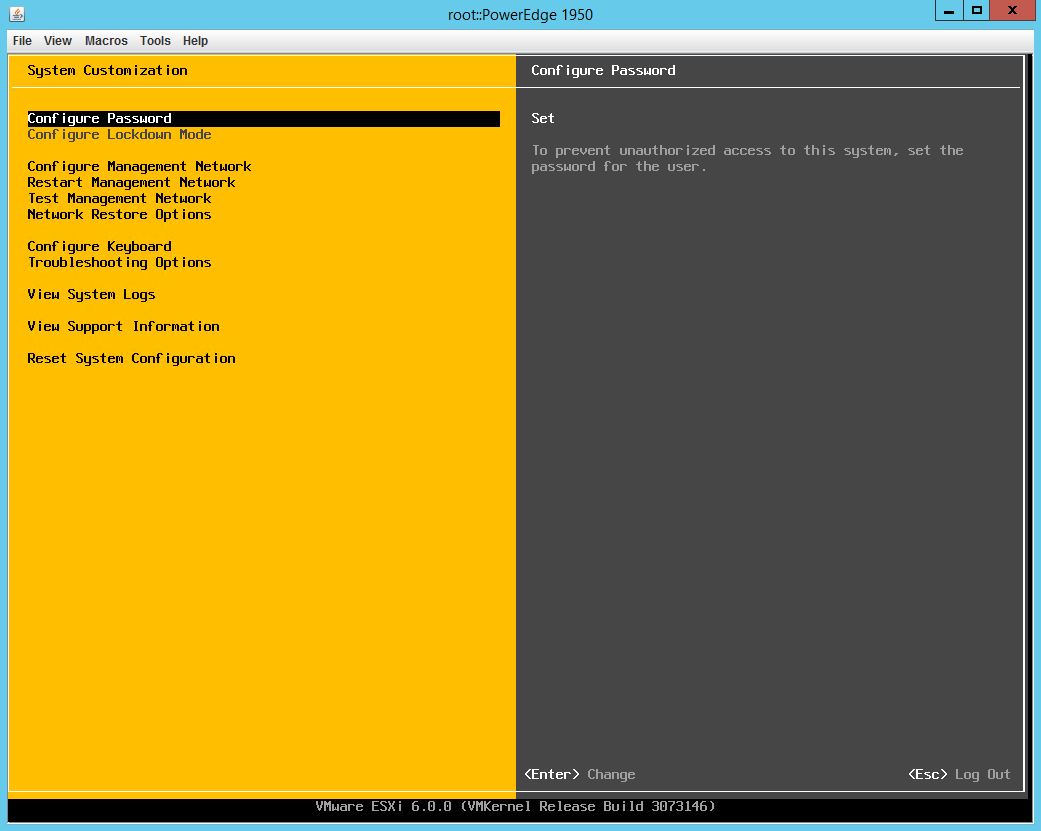
The first thing you’ll want to do is select Configure Management Network and select Network Adapters:
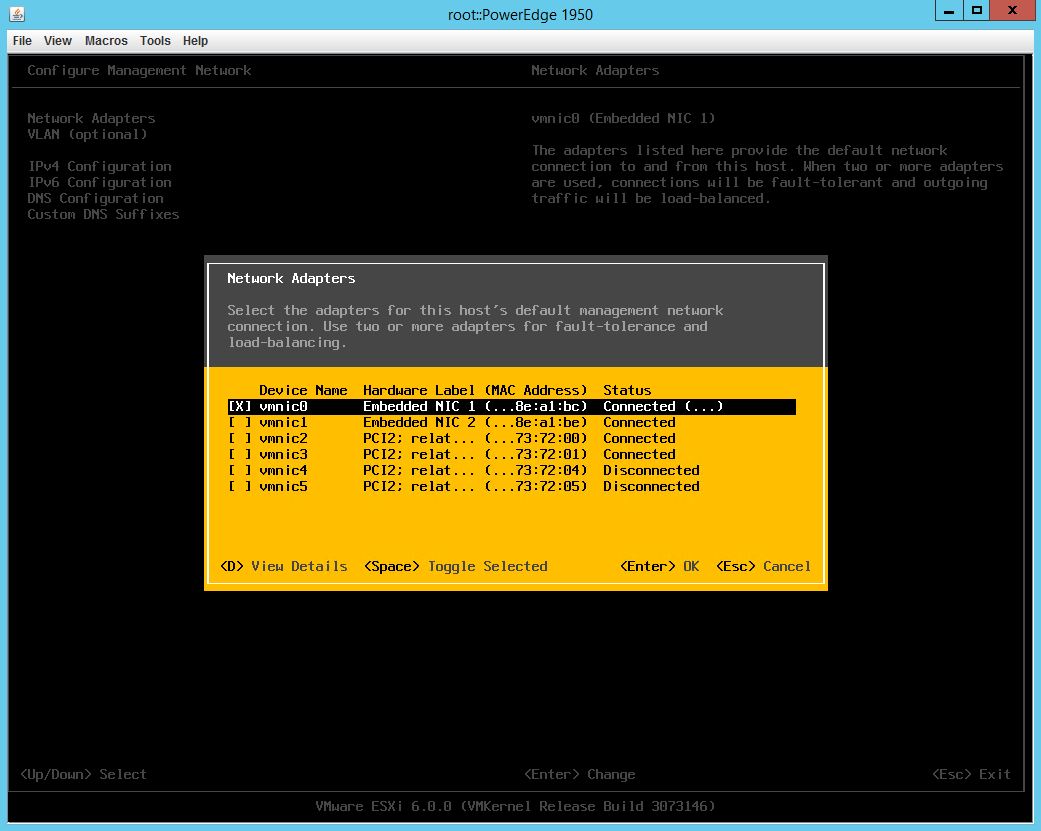
As shown above, I have a single network interface active even though many are “connected”. Consider your own server – you may want more than two NICs active with one to each of two switches such that it’s highly available, but for lab purposes I will run just the one NIC. I have multiple because I use iSCSI storage in my environment.
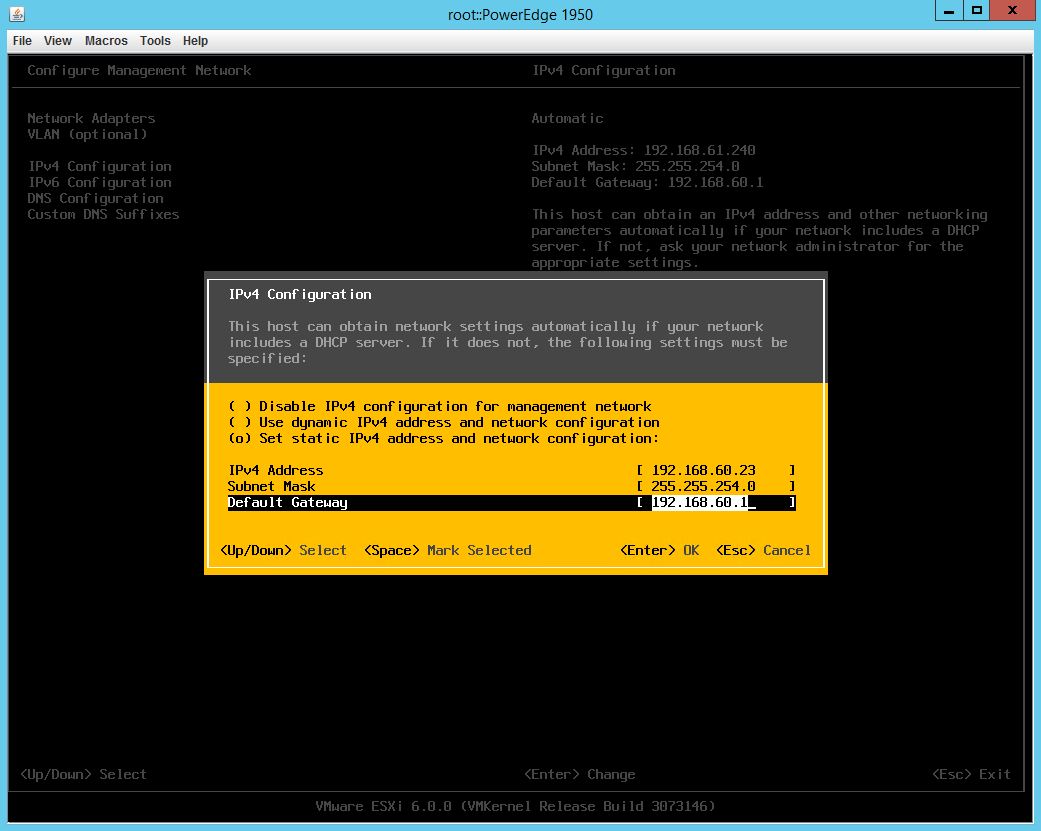
I won’t be setting a VLAN for the management interface so I skip that selection and next choose IPv4 Configuration and set the interface up with a static IP (hint: remember to hit Enter to accept the settings, not Esc to go back):
Next, select IPv6 Configuration and unless you have an explicit reason for keeping it enabled, disable it. Disabling IPv6 requires a reboot of the host – don’t bother rebooting yet:

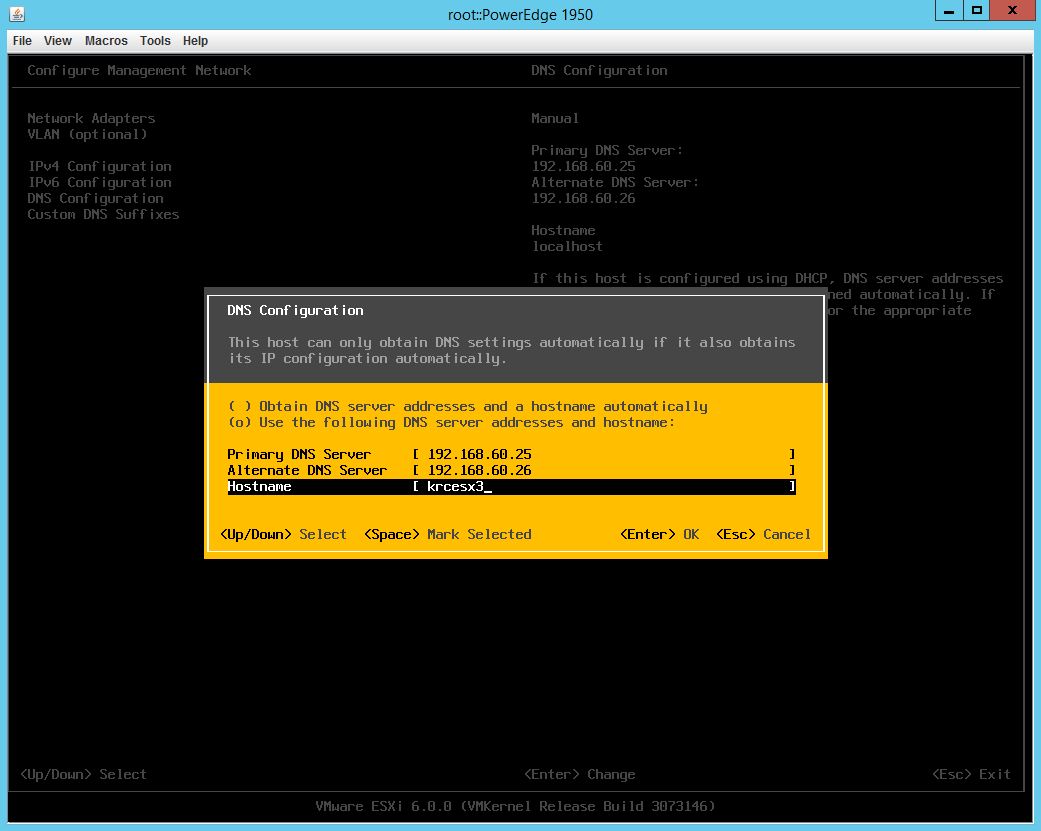
Once back to the network configuration screen, select the option for DNS Configuration and setup your primary and secondary DNS servers and define the hostname for your new ESXi host:
The last setting to configure Custom DNS Suffixes from the network configuration menu – put your domain name suffix in:
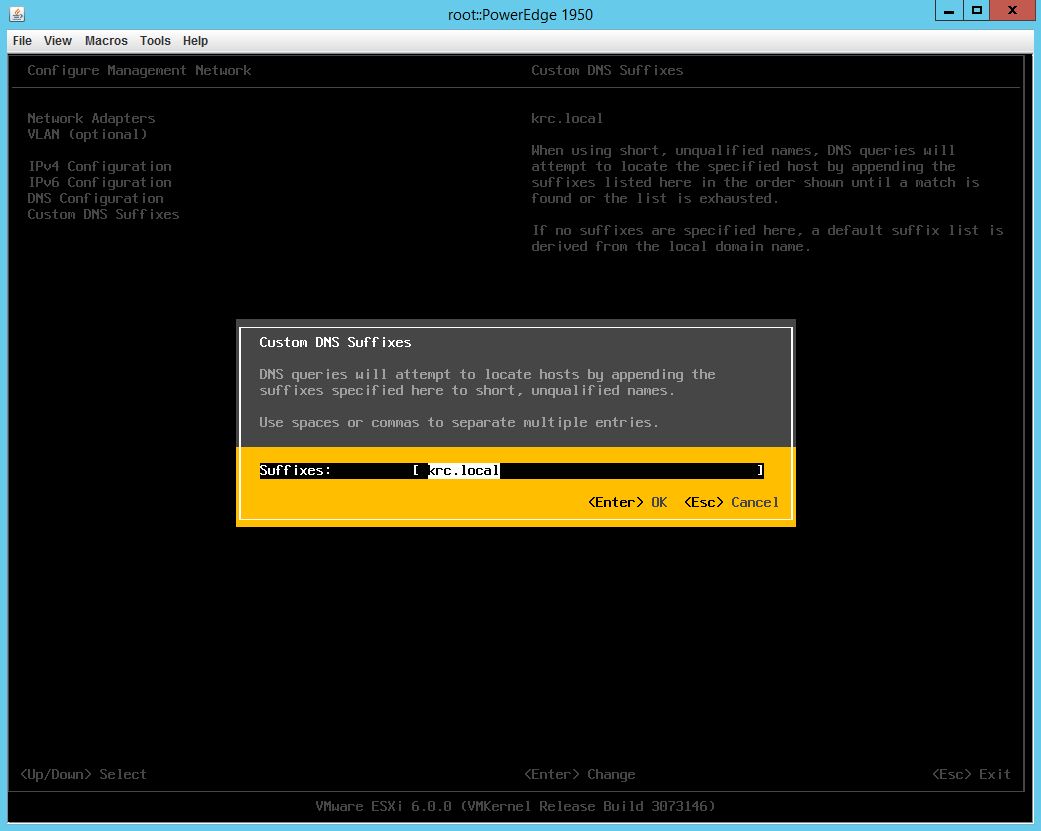
After applying the DNS Suffic and pressing Esc to return to the main menu you’ll be prompted to Apply Changes and reboot host – you can do this now:

Once the host reboots it should come up and display the correct hostname along with the correct IP address with (STATIC) next to it:

One good thing to do before moving on is to log into the host with the root user by pressing F2 and choosing Test Management Network. This will run a quick gamut of network connectivity tests which should all come back OK:
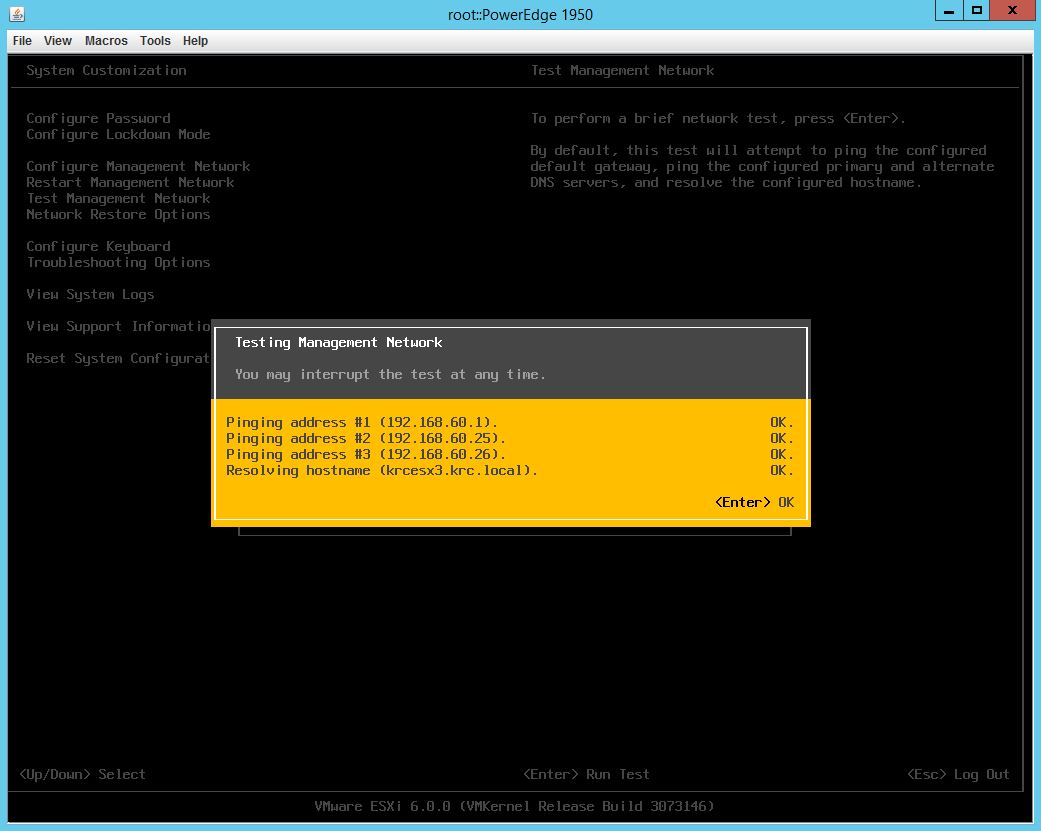
The test results above will only come back OK if you can reach the gateway, ping the two DNS servers you may have defined, and if there is a DNS entry on the servers that resolves the hostname of the host. There’s a good chance that this is your first ESXi host and thus you have no DNS servers created and so the 2nd, 3rd, and 4th test may fail.
From this point on you are pretty much done with the console of the ESXi host. You should not really need to access this again. You can reboot the host and perform some other tasks from the console, but for the most part we’ll be using the vSphere C# Client going forward.
So, follow this link in order to download the appropriate version of the vSphere C# Client for the version of ESXi you’ve deployed and install the client on a machine you plan to manage the host from.
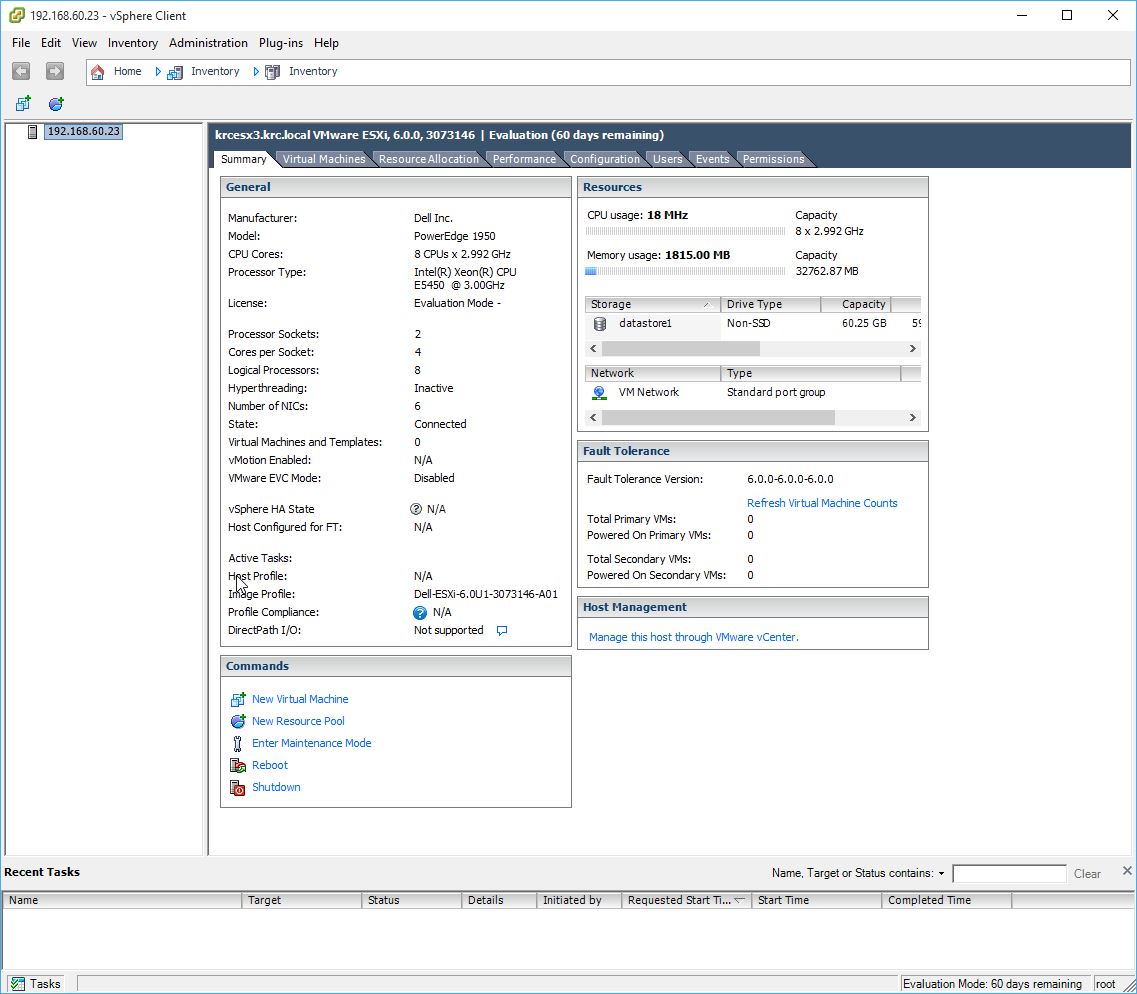
Once installed, connect to the ESXi host by DNS name (if you have it working) or IP address. You’ll provide the root user and password to connect directly to the host and accept any messages about SSL certificates:

When you connect successfully you’ll be greeted by an empty inventory and a host waiting for further configuration:
The first thing I do is select the host and click the Configuration tab, then click the Storage option on the left pane and rename datastore1 to [hostname]-datastore1. This will make it easy to know which local datastore belongs to which host should you have a cluster in the future – it’s good practice since every host will have a “datastore1” and it gets confusing:

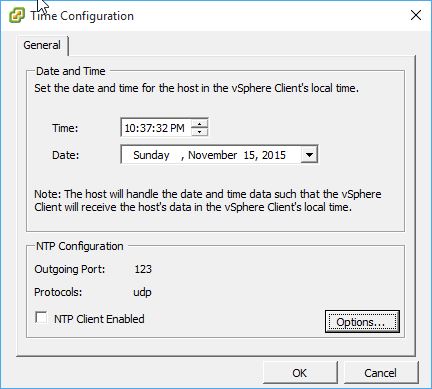
Next, click the Time Configuration option on the left pane, then click Properties in the upper right, and put a check box next to NTP Client Enabled:
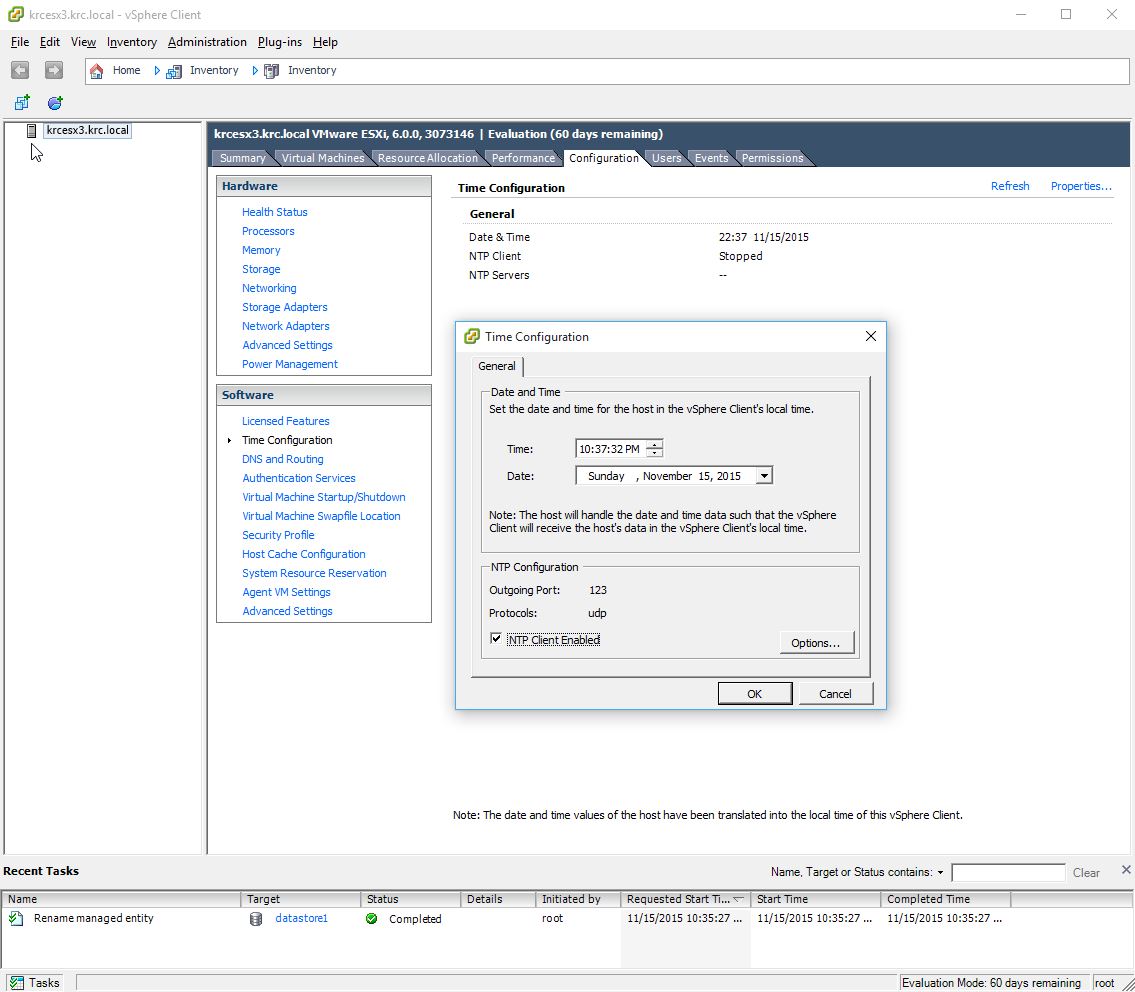
After enabled NTP, click the Options button to the right. Set the Startup Policy to “Start and stop with host“:

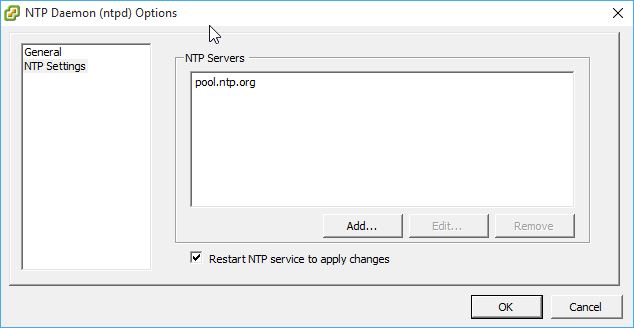
Then, click NTP Settings on the left hand side and click Add… in order to add an NTP server (I use pool.ntp.org) and then put a check mark in the box to Restart NTP service to apply changes and click OK:
You should now see that NTP is running and the time should be valid:
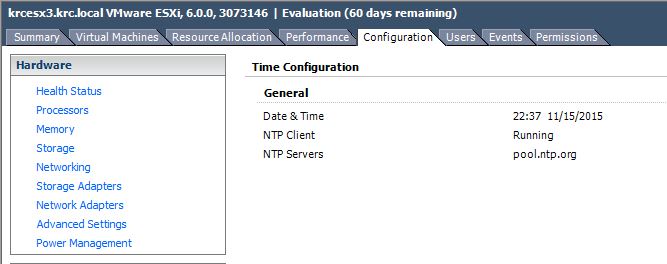
Sometimes if your time is far off NTP will not bring it back in sync – set the time manually and then restart the NTP service as above and it should start working.
If you installed ESXi to a USB key or SD card you will have an error showing up in Summary about the system logs being stored on non-persistent storage. In order to remedy this you just need to create a folder on your local datastore and then point the global log under Advanced Settings to that datastore/folder. You can read more detailed instructions by following this link to the official VMware KB.
And, that’s it! You’ve successfully deployed your ESXi host. There are things I’d recommend you check into – for instance, if you have enabled more than one NIC so that your management VMkernel is highly available then you may wish confirm that the two NICs are in Active/Active mode by editing the vSwitch0 properties and setting the Failover Order as below:

Other than small stuff like that, you’re ready to deploy some VMs! The next blog entry will cover deploying the VCSA and then configuring the environment to work well with vCenter.
Stay tuned!
 I am a Sr. Systems Engineer by profession and am interested in all aspects of technology. I am most interested in virtualization, storage, and enterprise hardware. I am also interested in leveraging public and private cloud technologies such as Amazon AWS, Microsoft Azure, and vRealize Automation/vCloud Director. When not working with technology I enjoy building high performance cars and dabbling with photography. Thanks for checking out my blog!

July 26, 2017
Quick Question… Did you get to the next part about the vcenter installation?
October 24, 2016
excellent thanks – used this to get up and running. I would have been very interested in part 2…
Cheers
October 2, 2016
What happened to part 2?