
This is “Part I” – as a sort of “Part II” I’ve upgraded this server some – click this link to read more about that, otherwise continue on!
Hey everyone – so for Christmas this year I wanted to build a low power ESXi box but with a lot storage preferably. The Lenovo TS140 was on sale at NewEgg on their eBay store and included the Intel Xeon E3-1225v3 (3.2GHz quad-core) with 4GB of RAM, the chassis, power supply, etc. but no disks. This is a great deal because the CPU alone is $220, which would leave you hard pressed to find a server-grade motherboard (ECC memory, Intel AMT, etc.) for <$100, and then some memory (although 4GB is not much, I’ve added more for a total of 32GB now). The Lenovo motherboard itself is actually really nice and the chassis is very high quality for a machine this price – if only it could hold more than 4 or 5 drives…
For those who would rather hear me ramble on vs. ramble on in text, check out the video I made – I cover more about the build and some minor details here and there in the video:
https://www.youtube.com/watch?v=ZHUYPRf75U4
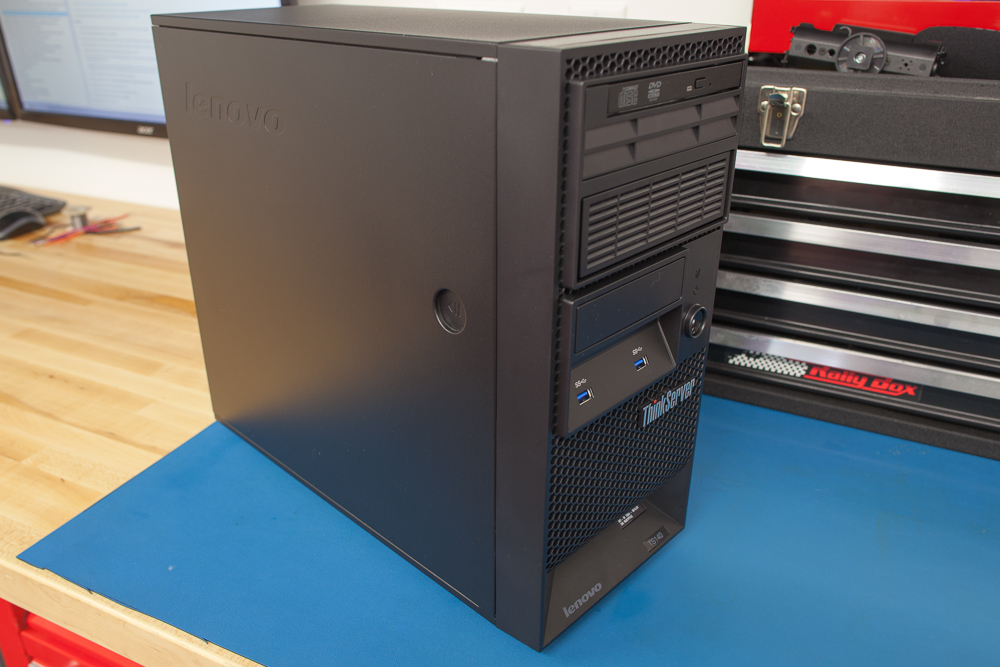
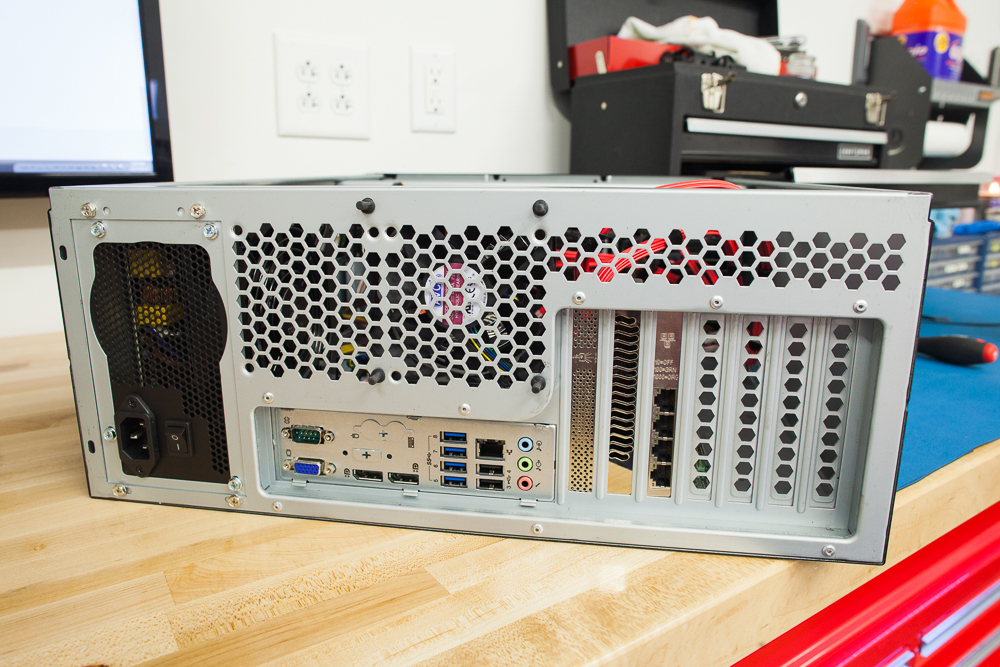
For those still reading, here are some images of the TS140 chassis before we dig in:
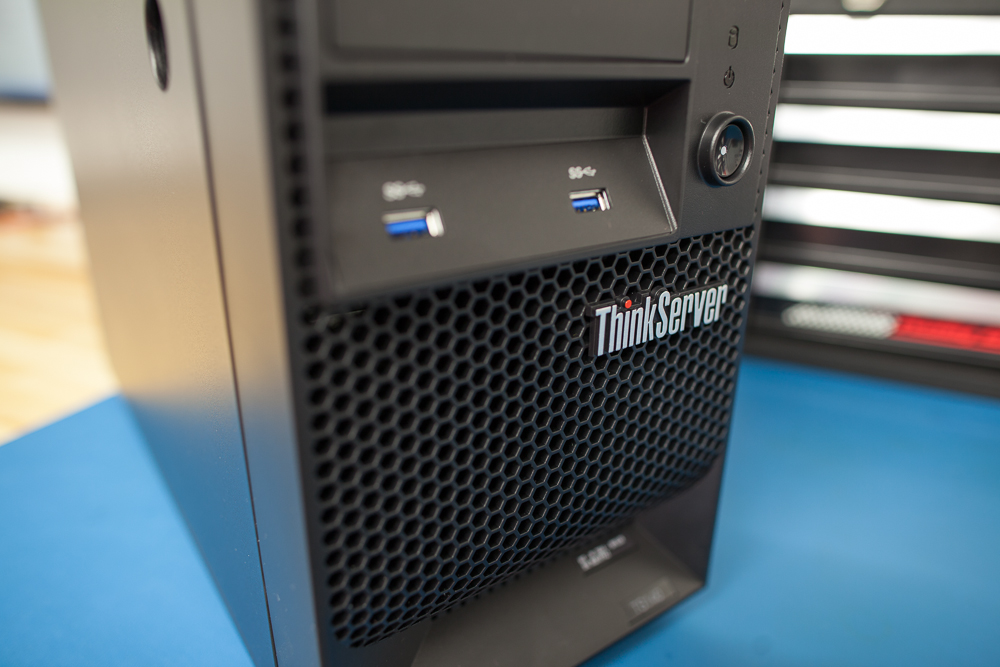
 Opening the case, you’ll see a couple great features including tool-less drive caddies, isolated PWM fans, low-profile optical drive, and an overall clean case. The only thing I saw that was an actual negative, in my opinion, was that the SATA power is all through the motherboard using 4-pin ATX cables that have only 3 SATA connectors per. This means that, once you’ve discounted the optical drive and maybe a system drive (SSD, etc.) you can only power 4 additional disks. This is fine for a RAID5 with large disks, but that doesn’t leave for much redundancy and you’d have to use pretty large disks to make it worthwhile.

A look inside an empty TS140 case
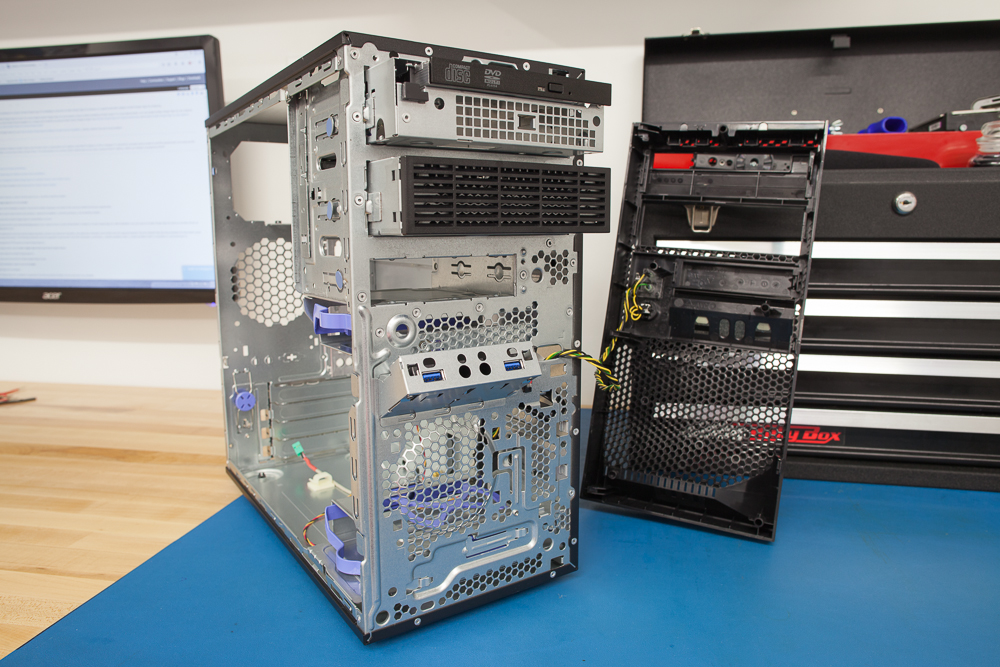
A look behind the TS140 front facia
What you could do is transplant the whole TS140 into a 4U rackmount chassis like this one which would give you the room for more drives. Then, you could add a RAID controller like an LSI 9260-8i (or similar) and add a bunch of drives and make a big ol’ RAID array or pass the drives through to a VM for another storage setup, etc. And, if you haven’t caught on by now – that’s exactly what I am doing! I am placing the TS140 motherboard and any needed components into a Rosewill RSV-4000 4U rack case where I will then install an LSI 9260-8i controller with (8) 1TB WD SATA drives in a RAID10 for one big mass storage for VMs to live on. I will then create a Windows 2012 R2 server to act as a file server. The only thing that was a bit of an issue is, even once transplanted into the Rosewill case, I still didn’t have a way to hook up more drives to the power supply because of the proprietary Lenovo connectors. Here is the Rosewill case I’ll be using:

Rosewill RSV-4000
So, all I needed to do is figure out how to fit a standard ATX power supply and I’d be set. Well, that, and I realized that if any of the fans are left unplugged the server will complain that a fan has failed and require you to press F1 or F2 to continue – annoying. So, I’d also need to transplant the fans… so, let’s check that out.

Fan behind optical drive
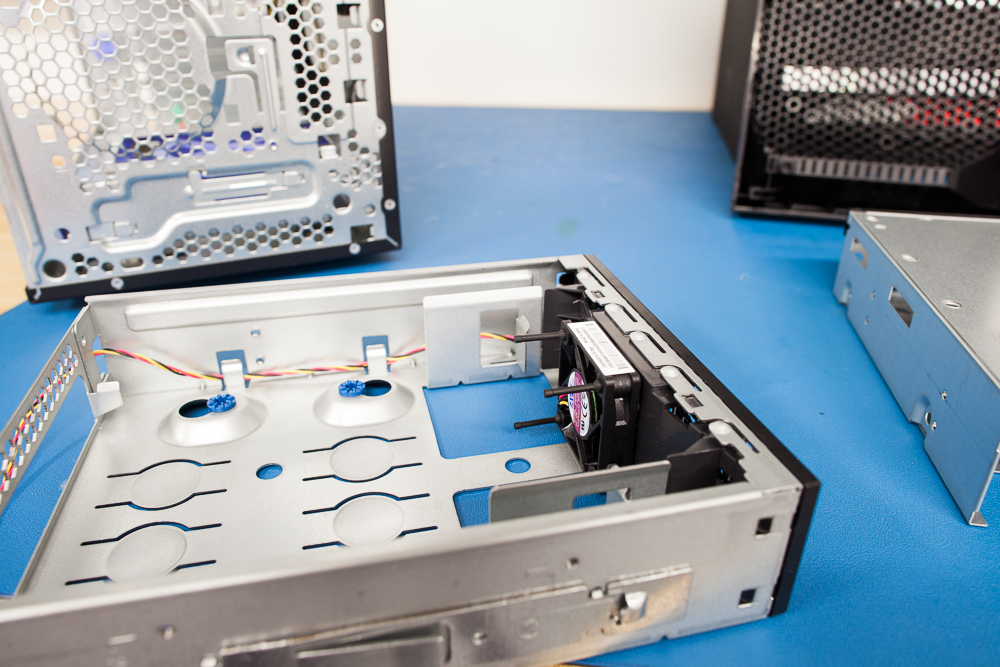
Fan behind blank 5.25″ plate
Above, you’ll see that the small 40mm fans that are tied together with a 3-wire fan splitter. They are actually nice, quiet fans (though I can’t say that it makes much sense having them in the factory TS140…) and are mounted with isolating rubber mounts – I like these things! So, we’ll have to harvest one or both of these fans (or you could get clever and make a circuit that reports an RPM as if a fan were plugged in) and place them in the Rosewill RSV-4000. The larger fans at the front and rear of the TS140 case are PWM controlled and seem of very good quality. The Rosewill case comes with (2) 80mm dumb fans with ordinary molex connectors – the problem is that the TS140 uses a 92mm fan front and rear, so we’ll have to get creative there too! Almost doesn’t seem worth it all until you realize these are not huge feats. We’ll tackle the fans, but let’s start with the power supply issue first.
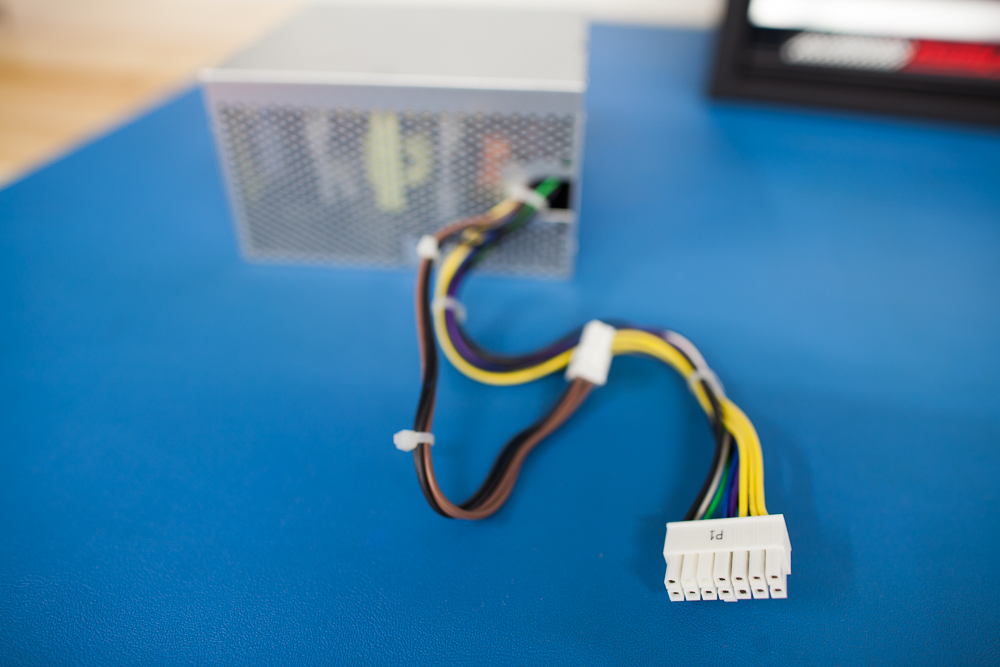
Power supply with 14-pin connector
Above you’ll find the Lenovo power supply with the funky proprietary 14-pin connector. This needs to be adapted to work with the 24-pin standard ATX power supply we’ll use to hook up more drives. Fortunately, Lenovo has been doing this in their desktops for a while and people have worked it out. In all, you’ll see that the 14-pin has yellow, black, blue, purple, green, and grey wires – basically, Lenovo supplies +12v, ground, +5v, and then some PSU status wires to the motherboard. In order to get the 3.3v and other things needed, they have an on-board power supply. We could crimp on more SATA connectors to the factory Lenovo cabling, but I don’t want to overdraw the motherboard circuitry and make a mess of things. Here are the funky proprietary 4-pin SATA cables:

Lenovo SATA power cable
So, to adapt the 14-pin to a 24-pin connector we just need to cut a few pins off and re-pin the 24-pin. In doing so, I also removed the cables that won’t be used on the 24-pin to make things more straight forward. You can also buy this adapter pre-made, but what’s the fun in that? Fortunately, there are guides out there on how to make the connector so I checked them out, confirmed things, and went to town. I found this tutorial particularly useful. That guide also has a handy video for people to follow along. I went to MicroCenter and picked up the necessary 24-pin to 20-pin adapter (which we will make into a 24-pin to 16-pin adapter) and created the adapter in about 20 minutes. Below you’ll see the piece of the adapter I chopped off. It helps to have these ATX pin tools to remove the wires from the holes but you can do it with small pieces of wire, needles, whatever you can put down in there to push in the small tabs.
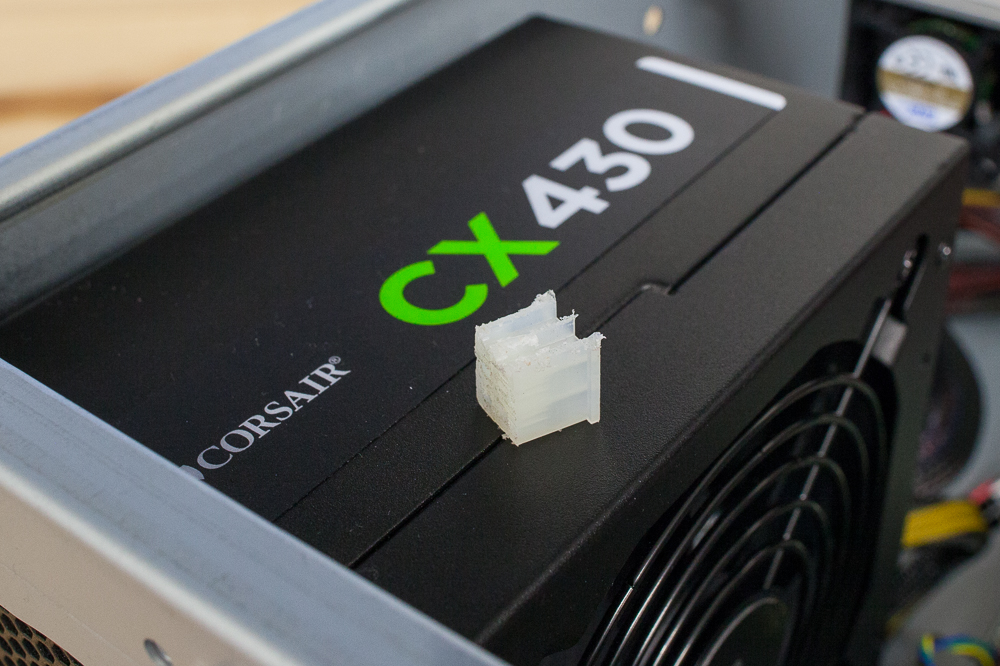
20-pin side of a 24-pin to 20-pin adapter cut down
If you do make your own cable adapter, just note that the 24-pin ATX connector is only going to have two 12v (yellow) wires while the 14-pin Lenovo side will need three – to remedy this you’ll need to split one of the yellow wires from the 24-pin side into two – not all that difficult really.
With that done, all I had to do was install the fans and back plate. The fans required drilling two holes in the back of the chassis to fit a 92mm fan in an 80mm position. To fit the back plate you’ll need to bend the three top tabs down, insert the plate in the back of your new chassis, and then either bend the tabs back or use the motherboard to hold it in place. You can see all of this below:
TS140 back plate and 92mm fan installed
Below you’ll see the LSI 9260-8i controller, Intel Pro/1000 VT 4-port NIC, and blower fan I placed between the two:

TS140 Components
I don’t have a picture, but I installed the second 92mm fan in the front of the Rosewill RSV-4000 by utilizing the rubbery isolation mounts and pulling them through the blank 5.25″ plates in the front of the chassis. I still needed to install one of the 40mm fans, so I installed the deeper of the two (as it seemed slightly quieter) and zip-tied it to the aluminum crossbar on the chassis. The fans move almost no air, so I didn’t think there was any reason to aim it any where specific. Though, maybe I could have put it on the chipset heatsink or NIC area – whichever. You can see that in the image near the power supply, below:
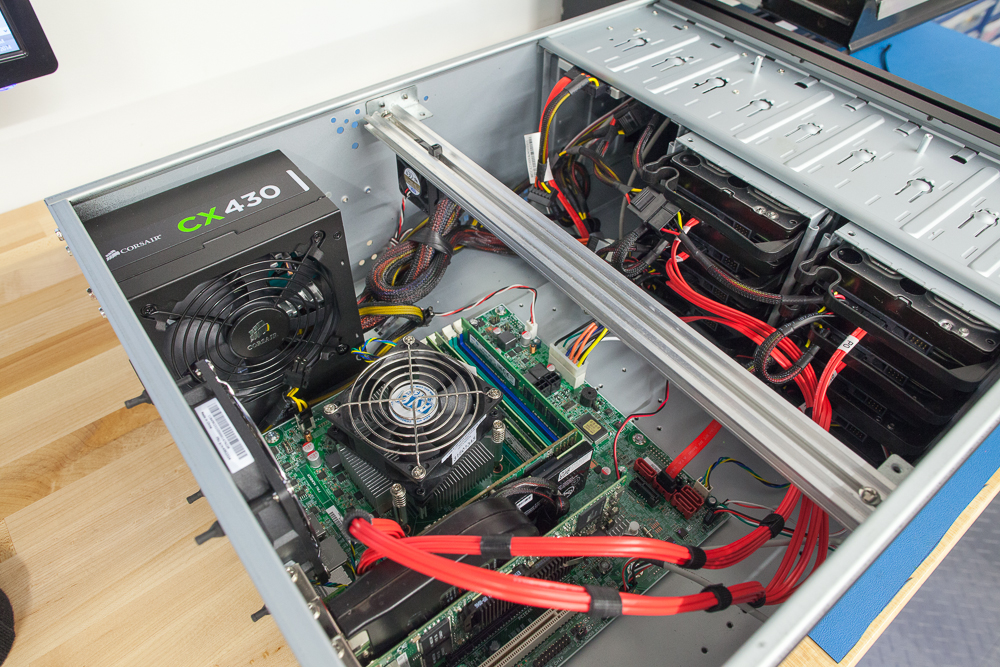
TS140 board transplanted
You can also see I’ve got the blower, RAID controller, NIC, all the SFF fan out cables tidied up, and everything looking good. More observant viewers will notice that there’s also an SSD installed toward the top of the image on the underside of the chassis overhang. That is a Crucial MX100 256GB SSD I picked up to install ESXi to and create super fast storage for VMs that might need it.
The only other thing you’ll need to work out is the power switch, power LED, and HDD LED (if you want them). The TS140’s original chassis has a one-piece jumper header for this so I had to just trace out the wires and place them on the pin headers properly. Here’s a crappy picture of that:

Rosewill power, etc.
After that, you’re ready to go! You’ve now got a TS140 transplanted into a rackmount case w/ an aftermarket ATX power supply so that you can run more hard drives, graphics cards, whatever. There is only one more item from the factory setup that I have omitted which is a small temperature sensor that fits on the front of the original TS140 chassis. It’s on a 4 or 5 pin connector and the system doesn’t seem to mind that it’s not moved over. I will move it over, however, just so that the system is able to monitor chassis intake temps as this may become important for PWM control over the fans. We’ll see. I’ve created my drive groups, installed ESXi, setup all my VMs (migrated them from an iSCSI target), and installed the LSI SMIS provider for ESXi 5.5 so that I can see the status of the controller and drives from within vSphere. Here’s a screenshot of that:
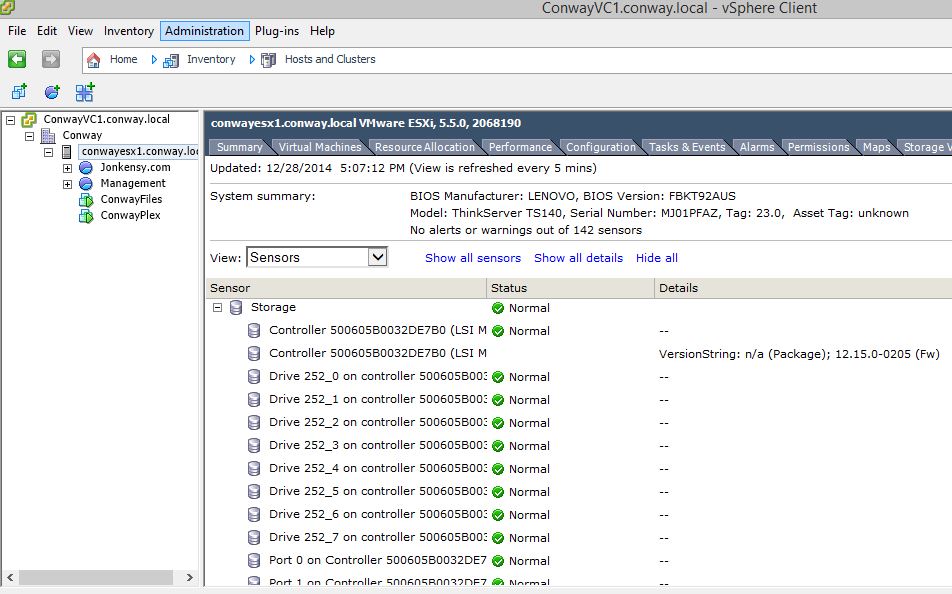
LSI 9260-8i status in vSphere
And that’s all there is to it! I now have a lower cost, quiet, power-efficient, modern server with all of the perks of a larger 4U chassis. Again, I go into more detail in my video I posted at the top of this post, but this is all the little details that you can graze over if interested. Thanks for reading and let me know if you guys have any questions!
Just to repeat what’s in the head of this post, I upgraded this server from an E3-1225v3 CPU to a E3-1246v3 and go in depth about that upgrade in the following post, check it out!
The Little Lenovo TS140 That Could – now with Xeon E3-1246vc3!
 I am a Sr. Systems Engineer by profession and am interested in all aspects of technology. I am most interested in virtualization, storage, and enterprise hardware. I am also interested in leveraging public and private cloud technologies such as Amazon AWS, Microsoft Azure, and vRealize Automation/vCloud Director. When not working with technology I enjoy building high performance cars and dabbling with photography. Thanks for checking out my blog!

April 13, 2021
Muito bom!
December 31, 2018
i wish you would have given more useful information on the power/reset switch e.g……what you have is not helpful. at all.
September 16, 2017
Thank you for a great tutorial.
The photo of the front panel pinout and the advice about the fans was very helpful.
September 18, 2017
Thanks! Glad you found it useful!
July 1, 2017
HI can you share your motherboard pinout diagram? The picture is helpful but cant tell what cable is which and its direction. Thanks
June 23, 2016
Hi
I just changed the original PSU for a 700W one.
So regarding the white wire the original PSU had it, also showed around 1.6v when the computer was up and running. Because of that I was first a bit anxious about changing to a another PSU without knowing what it was for so I opened up the original PSU and it said PMeter on the silk screen of the PCB. I assume this is power measurement and thus irrelevant.
Thanks for the tutorial. Even if I didn’t do it at all the same way it’s a comfort to know that other has done this before and that it works.
March 19, 2016
Hi Jon, love the posts about the TS140. I bought one ~1.5 years ago and I’m running into a strange issue. I am wondering if you have seen the same thing, or would be willing to run a quick test. In short, in ESXi 6.0, SSD performance is great, but HDD performance is about half of what it should be. If you have some time, check out my Reddit post: https://www.reddit.com/r/homelab/comments/4a8hlj/esxi_60_on_dell_t20_slow_hdd_performance/
The post is originally about my Dell T20, but I confirmed my TS140 also has the same issue. Both of them use the same Intel C226 chipset, so I’m starting to think this is an ESXi incompatibility.
January 27, 2016
Is there any reason why I can’t transplant the stock PSU into the new case as well? I’m not looking to run anything power hungry. I’d just like to be able to rack the server.
January 28, 2016
No, you can use the stock psu. Be aware that power to all sata-devices will go through the motherboard and that you have a very limited number of connectors. I think it’s four sata-power connectors in total. The stock psu only has atx and cpu power connectors coming out of it.
January 31, 2016
That’s correct – there will be only four SATA connectors and no molex connectors, so while you can continue to use the stock PSU you may be looking to transplant into a new case so you can add more drives in which case the stock PSU will be a hindrance.
February 9, 2016
Thanks. Can you please post the pinouts for the power, hdd, reset headers?
July 22, 2019
Actually, it’s six SATA power connectors, three on each cable. As you can see in the picture in the article. But, there are only 5 SATA data ports on the motherboard.
January 11, 2016
Jon,
Thanks for the writeup, I am doing a similar project with the Rosewill RSV-L4412 (12 bay hot swap) and came upon this. I was concerned about the proprietary fromt panel USB header but noticed from the Lenovo schematics there is a standard one as well. I see in your photos you hooked it up but thought I would mention for other readers that might not have noticed.
August 16, 2015
Hey,
First of all – thanks for the detailed blog entry! Always amazed how much time and effort people take to do such things.
I’m in the terms of aquiring parts for a pretty different project. (Hackintosh build with ts140 (case only)).
In the vid you said you’d confirm wether the motherboard was atx form factor or not. Is it? Any info much apprechiated since google was of no help here.
August 18, 2015
It seems to be a microATX motherboard as stated in this blog post.
http://arstechnica.com/civis/viewtopic.php?t=1261853
August 21, 2015
Sorry for the delayed response – the board is in fact an mATX.
May 23, 2015
Hi Jon – Thanks for the posts about transplanting the ts140 into a rackmount chassis. Did the same thing here. The fans don’t need to be brought over to the new chassis…but to resolve the BIOS error 0135 you will need to reset the BIOS. The 92mm and 40mm fans didn’t really work on my rackmount case, so I replaced with Noctua 80mm & 120mm’s.
Also, have you figured out what the other 11 unused front panel pins are for?
May 27, 2015
Thanks dorsey I did hear that the fans do not need to be installed and that you can just reset the BIOS but I do wonder if doing that makes the BIOS unaware of other fan changes so I avoided it for now. Its not the worst idea to have the 40mm and 92mm in the case moving air around anyway especially in my case where it’s full of SAS cables and disks. I haven’t found out what the unused pins on the header are for yet, but if you find out, let me know!
May 6, 2015
Hi. Have you tested TS140 on software raid speed? I’m going to use raid10 and wondering is it worth to invest 300€ to hardware raid.
May 6, 2015
Hi Kimmo – unfortunately you won’t be able to use software RAID. ESXi will not install to a software RAID or “fake RAID” controller. Need to have single disks or hardware RAID. I recommend the LSI 9260-8i controller – pick one up on eBay second hand for $165USD.
March 26, 2015
Hi Jon, excellent article on the TS140.I am thinking of getting one with an E3-1245v3 however I have a question about Esxi and the on board SATA controller. Would I be able to use the on board SATA ports for both the ESXi and my virtual machines? My idea was to have an SSD like you for the ESXi and VMs and to use the 4 other SATA ports for the HDDs of my FreeNAS which would be virtualised. Would that be possible or would I have to get a raid controller for the NAS disks? Many thanks in advance for your input.
March 26, 2015
Hi Johev – you can use ESXi and the onboard SATA controller but not for RAID. So if you just use single disks you can do that and run VMs off of single disks. Software/Fake RAID like most onboards are not supported by ESXi but if you are just looking to pass the SATA controller through to a VM that’ll work (I believe).
March 26, 2015
Thank you for the fast reply Jon. I was wondering if I could use 4 SATA ports, allocate them all to FreeNAS and have those HDDs configured in ZFS Raid (software RAID). Would I be able to use the on board controller for that? Trying to decide between a TS140 and a Dell T20. However the T20 has only 4 SATA ports on board and uses a 1225v3 for about 200 USD less :). Many thanks for your help.
March 27, 2015
Yes you should be able to do that without issue. The T20 is less than the TS140? I am seeing the TS140 at $299 – $329 w/ E3-1225v3 still. T20 looks similarly priced.
March 30, 2015
Well Jon, unfortunately I’m in Europe and the prices here are less competitive than in the US. I’m trying to find out how many SATA ports does TS140 motherboard has on board. Could you please let me know if there are 5 or 6 of them? Many thanks in advance.
March 3, 2015
How’s the performance of Plex in esxi? I like this idea but i’ve heard transcoding in a VM is not very efficient.
March 6, 2015
Performance is perfect. We watch all of our movies on a Smart TV or from my laptop on wifi. It works very well! No issues what so ever. I even play on my phone sometimes so it has to transcode for that. I recently upgraded my CPU to get hyper threading, but even with the standard E3-1225v3 it was nice!
January 16, 2015
Hi.
First of all I want to thank you for the write-up! I just bought a TS140 myself and am going to transplant it to another chassis so I can fit more disks and run Hyper-V on it. I have one question though, in the guide you linked for making the 14-pin ATX connector there is a white cable missing. (There is a white cable in the connector in my TS140, but not mentioned in the guide.) Did you figure out what that wire is for, and what pin it matches up to in the 24-pin connector?
Thanks!
Joakim
January 20, 2015
Hi Joakim – are you sure you’re not seeing a gray wire on the Lenovo side? There isn’t a white wire on the 14-pin original PSU that I can remember or see, but there is a gray wire which may appear white. Can you confirm? Thanks for the comment!
January 22, 2015
Hi,
Thanks for getting back to me.
On my TS140 I have a white wire in the bottom right position of the 14-pin connector (bottom right on the pin-out here: https://www.adventuresindiy.com/wp-content/uploads/2014/05/14-pin-out-wire-colors-300×200.png)
The grey wire you mention is two positions up on the picture, on the other side of the green one.
Have a look at a photo of the connector in my server: http://s36.photobucket.com/user/HaboMaster/media/8618A778-2197-48F7-9FCF-E87E4DD61993_zpsx9dcs7jf.jpg.html
Is yours not the same?
January 24, 2015
Hi Joakim sorry for the delay been crazy busy. Yes my original Lenovo PS does have that white wire: https://www.flickr.com/photos/67031861@N08/16355283682/
However, based on the tutorial I followed I’ve got mine looking like this: https://www.adventuresindiy.com/wp-content/uploads/2014/05/new-power-connector-on-motherboard.jpg
I can grab a picture of mine if you’d like I just need to slide it out of the rack to pop the lid.
January 24, 2015
I take it you just ignored it then?
I looked around a bit and found that the white wire from the ATX standard is obsoleted but for some reason Lenovo decided to include it in our servers.
If yours is running fine without it mine will too, I’d thought about trying it but haven’t gotten around to it yet. Kind of busy here as well.
January 24, 2015
Yeah I believe I just de-pinned it on the adapter. I’ll double check for you though. I’ll have my ESXi box open in a week or two if you can wait – I am upgrading from eight 1TB disks to eight 4TB disks 🙂
April 18, 2015
Hi Jon, Thanks for the instruction. I have a Corsair CX430M, The motherboard plug has four orange wires two of the orange wires are connected to one pin, I am not clear on where the extra yellow wire needs to be soldered, Does the yellow wire match up with the pin with the two orange? Couldn’t see where you soldered it. Thanks!